INB Pages – #1

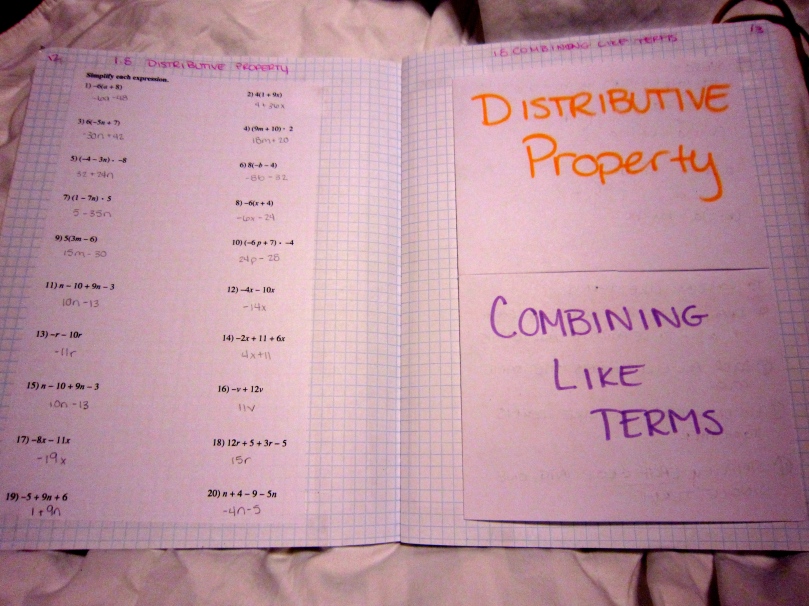
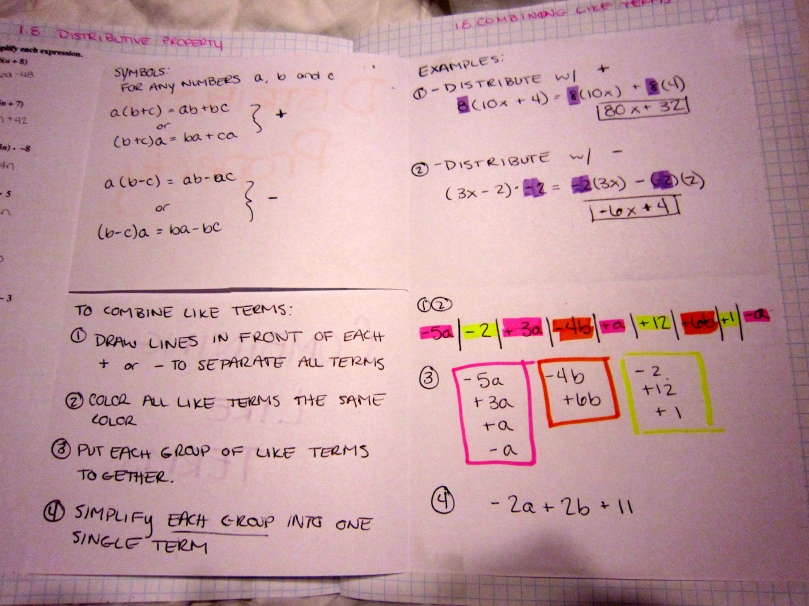
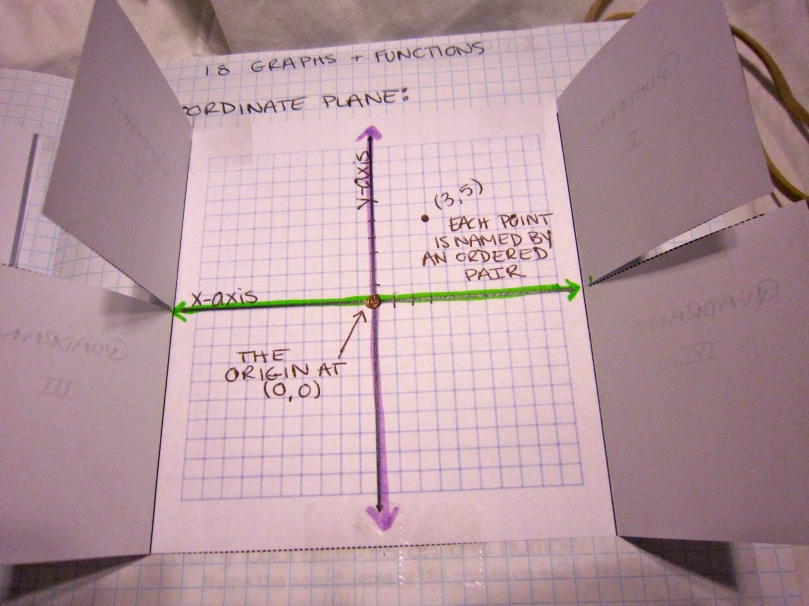
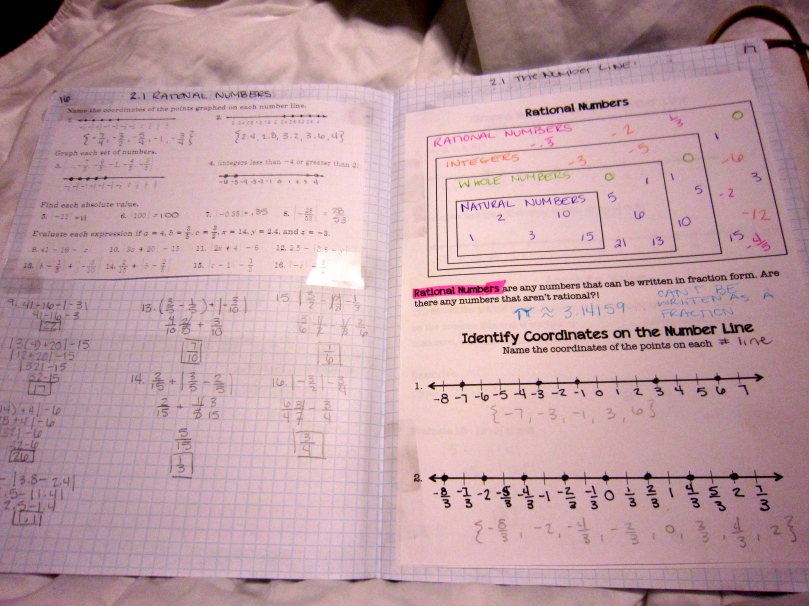
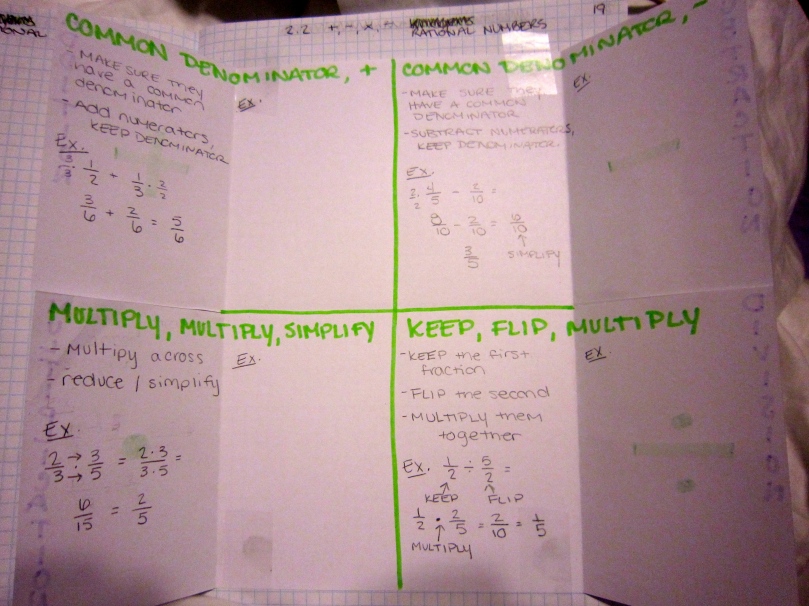
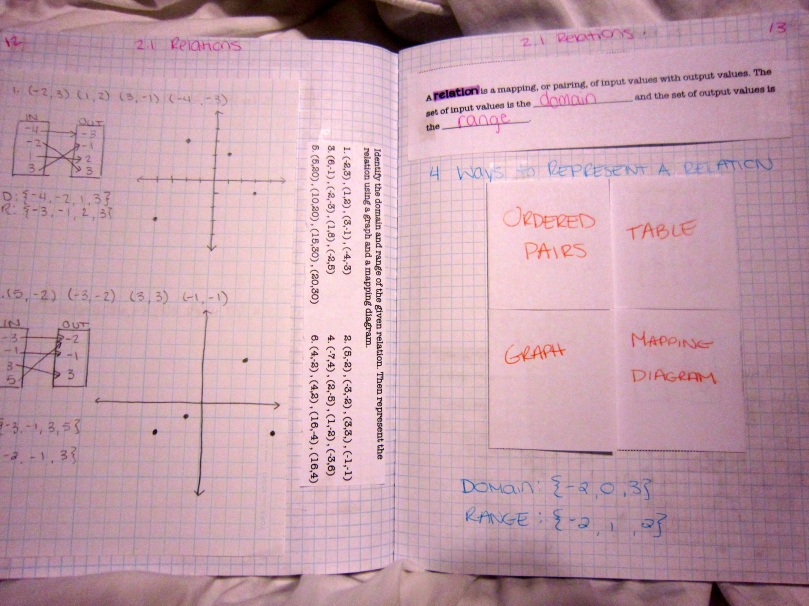
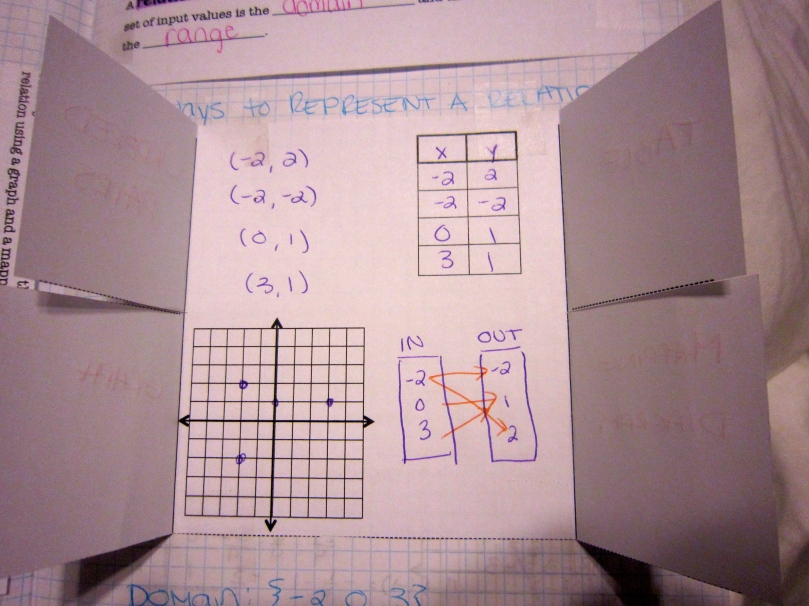
Here are my first week of Algebra 1 and Math 3 INB pages. Just the beginning, some I hated right after I taught the lesson. I’ll be better next year. I suck at the left hand page. As of right now all that I have them do are practice problems and homework. FAIL. (WARNING: A ton of ideas were stolen/altered from here)
Algebra 1:

Math 3:

Finished Classroom 2012-2013

View from the door.
Desk Area.

Absent Bins.


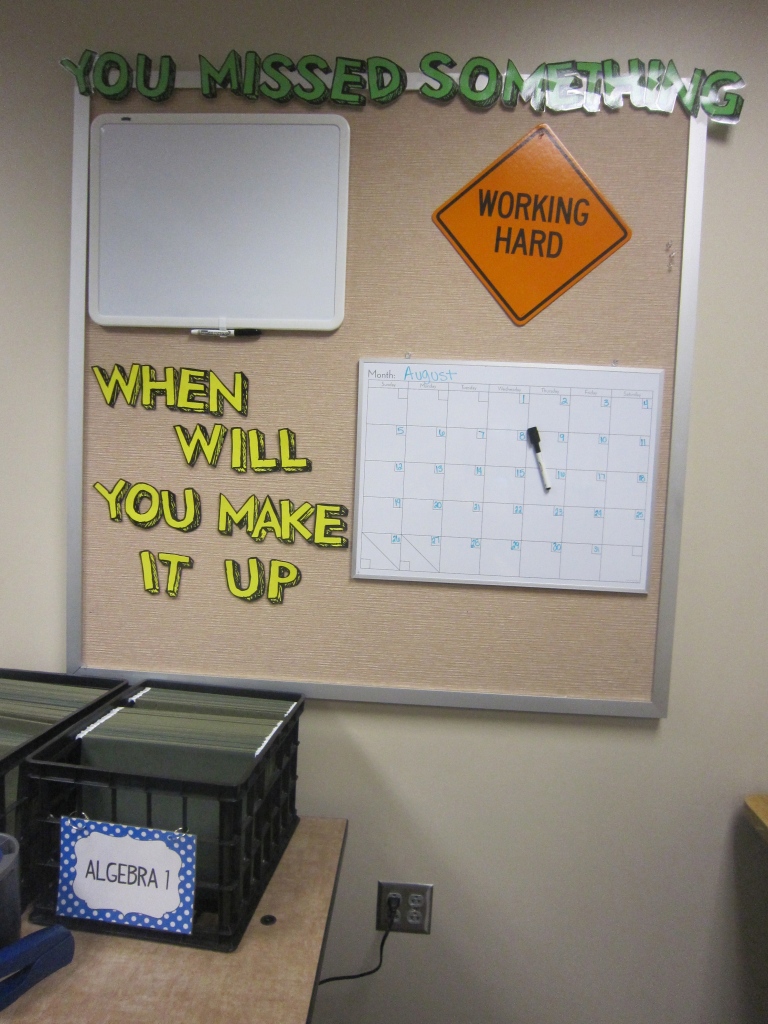
Absent Bulletin Board.


Algebra 1 Pick Up Center


Supply Bins/ Whiteboards/ Math 3 Pick Up Center


Pick Up Bins


Turn In Center
Desk Area – Complete with a TARDIS.


First Week Reflections

So this past Wednesday (8/22) I started at a brand new school. So much is different. First and foremost the student body has more than quadrupled, along with all the staff. A huge change now is that instead of me being about to make my own copies the night before (because I was a first year and I was just trying to make it through) I now have to give all my copies to the “Copy Lady” at least 2 days in advanced in order to have them in time. It seems a lot of the teachers take an entire chapter of materials to her at once, I’m not quite there yet, I’ll be spending my weekend of the goal of getting this whole week planned and then work my way up. Another big change is the school is COMPLETELY digital. I like it but at the same time I do miss that small town feel my old school had in the way that you had to go and actually talk to someone in order to get something done.

I changed a lot of what I did this first week compared to what I did last year. This time last year I had probably a 6 page syllabus clearing spelling out all my rules and procedures (Harry Wong style). This year my syllabus was 1 page, consisted of the course description, grade breakdown, and other basic information. I do think the change is a better idea. Uses less paper, especially because the students NEVER look at it again. On my first student day last year I went over the syllabus/rules/procedures all in one day and then assigned the “A Million Words…” assignment that I read on someones blog. Very few students did the assignment. This could have been because of two reasons: 1) Me – I didn’t do a very good job of “selling” it or 2) It was just the types of students I had. My students were in and out of YDC, were consistently missing school because of court dates, would often talk about getting drunk or doing drugs, and would spend much of class time cursing or threatening to beat each other up.

This year instead of doing the typical syllabus day and passing out books I tried to be a little more adventurous. I decided to do the “Snowball Activity” from Kate Nowak along with a “Numbers About Me Quiz.” I have no idea what I expected to happen, they had fun they talked, but when they got off task I was already having trouble getting their attention back. I can’t decide if I’m just being paranoid or if I might be just too young and inexperienced to have a first day like that quite yet. These students are so different though! Although I can tell some want to be class clowns and get a lot of attention. There has been no mention of drugs, police officers, threats of any kind and it is SO NICE. I took the next 2 days (yes two) to go over my syllabus, give out textbooks, do a survey, and go over all procedures. Although this seems like a lot, my classroom has a lot of organization (see upcoming classroom post) and I wanted to make sure that the students could handle it. I am most concerned about my supply buckets being abused with either having materials stolen or students not being able to handle having them at their desks. Although these two days seemed to be horribly boring, for me and for them I think they were important. Plus since they don’t have their composition notebooks yet, I don’t want to start actual content. I feel that if I let them take notes on paper that isn’t in their notebook they’ll never put them in it and they will just throw them away, teaching them that what we do in class is disposable (not okay). So yes, I went over the syllabus and then gave them a worksheet to fill out to get an idea about their attitude towards math class (some questions stolen from here) and I handed them out their books.

9/4 – So I wrote this post over a week ago and I still hadn’t posted it. So I’ve decided I’ll leave it as is to help me (in terms of record keeping) so if you came here for something profound turn back!

Classroom Setup Part 2

While far from done I did want to post some pictures of the progress I made in my room last Friday! The more I’m in this room the more I think I’m really going to like it despite the fact that there are no windows.

View from the door to the back left corner.

They still haven’t taken out all of the history stuff, I’m about to put the smack down! Also if you notice I have 6 pods of 4 and then 2 pods in the back of 2 because I didn’t want to have to move everything up in the room to make room in the back for another pod. Is this a good idea or should I say goodbye to my personal space upfront?

View from the door to the back right corner: My command center. I would have loved to do an L-Shape but it would have blocked drawers and cabinets. Plus I like that my desk is in the back so when they are taking a test I can easily spot and trouble makers.
My first bulletin board. (I need to get some kind of fabric to go on these but I just don’t foresee that happening in the near future as I’ve spent WAY too much on school stuff)

The idea for this came from Sarah (thanks so much I steal everything from you) Rubin over at Everybody is a Genius. My mom works at an office where they have a GINORMOUS printer, only downside is it only does things in black and white, nice thing is that if I decide I want to change these I can have that puppy spit a new one out on demand.

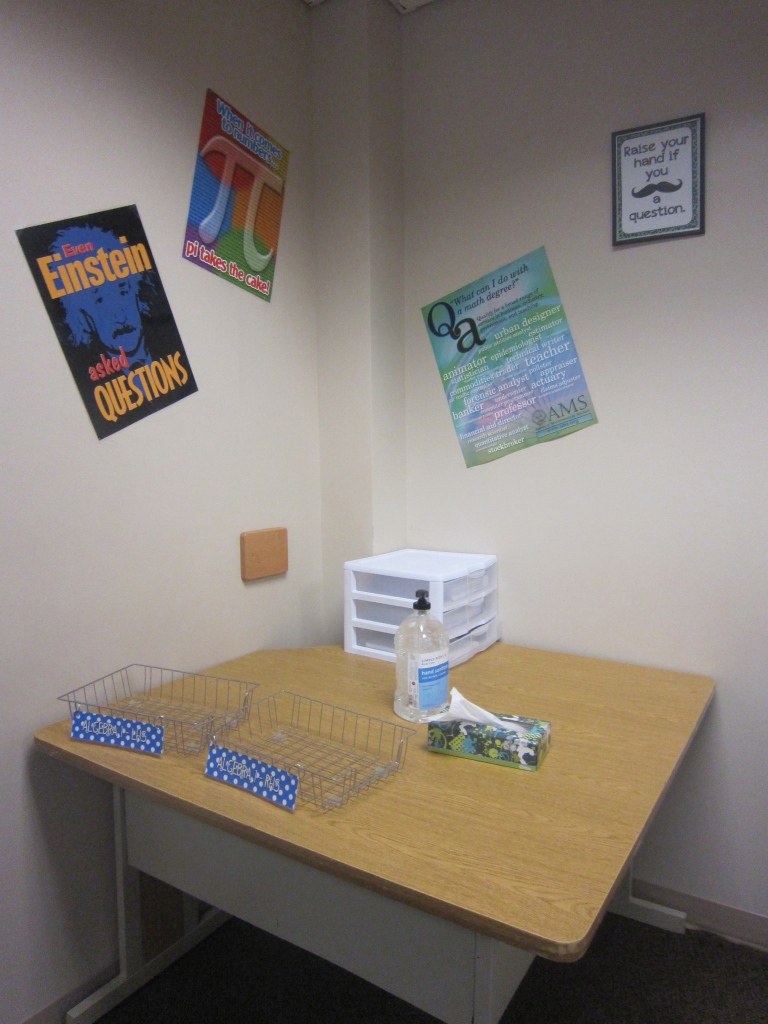
The “Student Corner” of my room.

This is where all the info they need can be found. The two black baskets are where I will use hanging files to put any print outs/ homework worksheets/ etc inside so if they are absent they can just come pluck one out. Or if a student comes in late in the year they can go and find all the important stuff – AND it also will be good for me to keep track of original copies. I’m also going to have things like hand sanitizer, a stapler, a pencil sharpener, etc here (is that too much? Help me classroom feng shui people).

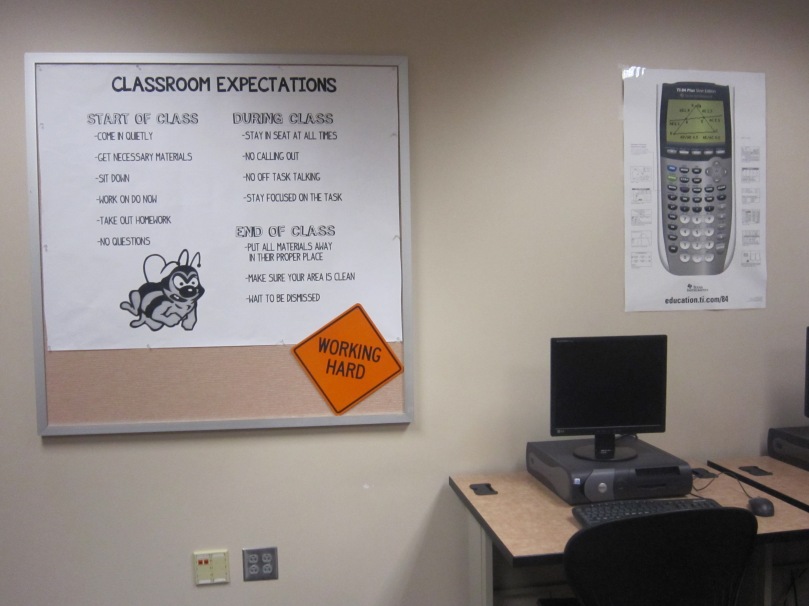
I plan on making the bulletin board into something similar that I saw here for when students are absent and they need to find out what they missed.

The little table I’m going to put commonly used papers (no homework form, graph paper, college ruled paper, warmup sheet) and I’m also going to have 4 little bins to serve as Algebra 1 & Math 3 – LHS & RHS. Funny story about this table, I was walking thru the hallway around my room and spotted it just sitting there all be his lonesome. I decided since I couldn’t find any soul around to ask, I would drag it into the very back corner of my classroom before anyone came looking for it. (In another life I was a hunter/gatherer/scavenger) Later that day one of the maintenance guys came around and asked me about if I had seen a table in the hallway – I played coy saying “OH RLY? A TABLE YOU SAY? IS SOMEONE LOOKING FOR IT?” Once he told me he was just going to taking it to storage – I fessed up :)

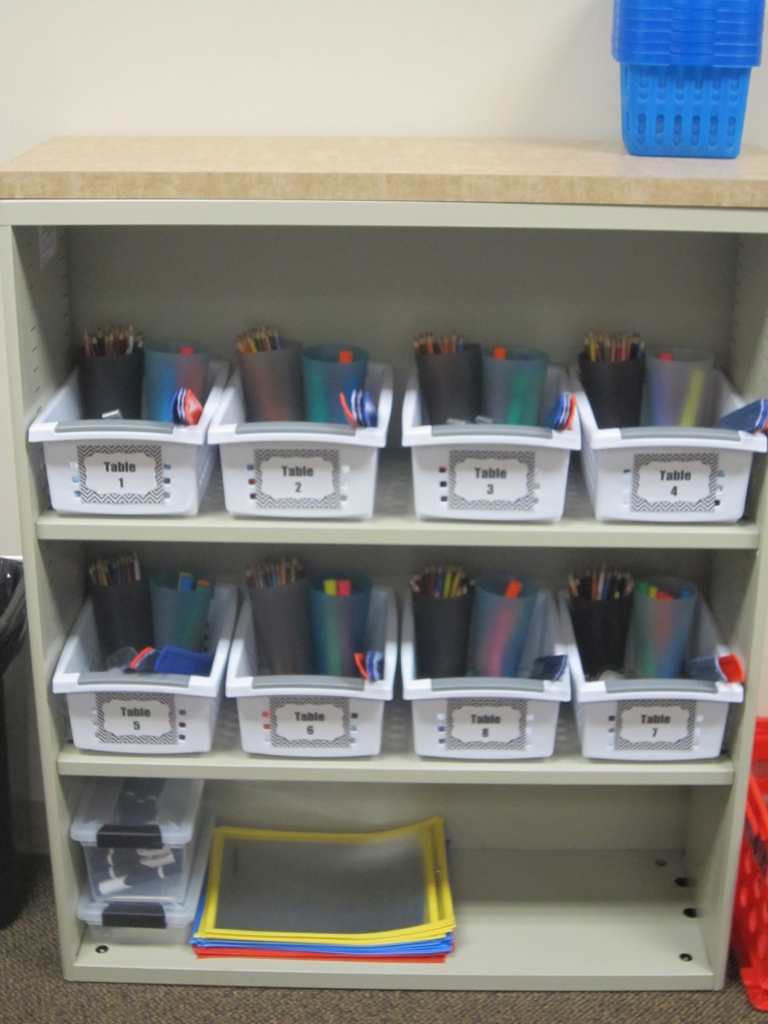
These are where I will store my INB supplies as well as things we commonly use, so I have whiteboard markers and sleeves there currently. The little blue buckets are an idea I saw on some elementary teachers blog as well as several others (I’m talking about YOU @msrubinmath) and they are for when the students are cutting to put their trash in them instead of getting up every two seconds to put it in the real trash can.
Inside of my INB store caddies.

Any suggestions on how to get the cups to stay stationary? I was thinking about using wall mounting tape – that stuff you get with dry erase boards that when you take them down you take part of the wall with you? Any other ideas? I’m also going to stick some #2s in there, anything else I’m missing? Is this too much? GAH.

Buckets to keep their INBs in – each class will be assigned a color and I will make little signs. There are two for each class. I don’t have the $$ or the wall space for any more.
My desk area!

Yay look at my little Bee!!! Anyway – the circular table I think I want to use at the “turn-in” station. So this is where they will plop their quizzes/tests/ and any other forms.

So Yay or Nay people? Help me get my stuff together before Wednesday!!!

Time is Money – A Fresh Start

While it is going to be my second year teaching, I’m starting at a brand new school and am really looking for a fresh start. There are two major things that I plan on implementing this year that I really hope improve my classes productivity and overall experience.

1. A Timer.

I want students to know that I value their time as well as my own, and I want them to know that in my class we use time wisely. Last year I would always say things like 5 more minutes and then what do ya know but 10 minutes would go by before I would actually buck up and tell them to quit what they were doing. I think because of this my students became more relaxed and knew they could take their good ole time. Not this year. I plan on implementing the timer on the first day to show that I mean business. Not only am I doing this for them, in terms of motivation, and as always preparing them for standardized testing, but I am doing this for me. A timer will give me more structure and help me pace my class. In terms of everyday class, I can say ok we are going to work on the warmup for 5 minutes, and set the timer. When its up so is the Warm-Up. Then I can set the timer for another 40 minutes – this will give me a ring a ding ding when it is time to close up class. I can give closure on the lesson, make sure all their notebooks are ready to go, and all supplies are put away. I can also use the timer and say ok peeps you got 20 minutes for this quiz – ready GO! The possibilities are endless and the more I think about it the more benefits I see.

Have you ever used a timer in your class? What benefits did you see or what did you not like about it?

2. Interactive Notebooks

So along with everyone else and their brother, I am going to give Interactive Notebooks (INBs) a shot (you can find out more information about what they are here). I think these are perfect for the classes I’ll be teaching which are Algebra 1 and Math 3. I think they will give the students great organization as well as a really useful tool that can be used in math classes in the future. I also think having a notebook like this will give students a lot of stability and a sense of consistency, without being necessarily consistent. I plan on incorporating all different kinds of ideas in my INBs, especially foldables. I used to think in college graphic organizers were things for 6 year olds because all they talked about were KWL charts – yawn. I love that foldables are a graphic organizer that have long term uses, especially when they are used to review concepts. I think students will immediately buy into them thinking they are an arts and craft project but really they are a way for students to keep all their thoughts and reflections in one place and in an order than should make sense to them.

Here are a couple of basics that I’ve made for my INBs:
Table of Contents

Intro to INBs: A total rip off of the one Sarah posted about here.

Rubric: Adapted from Megan’s Rubric which can be found here along with a TON of other INB resources.

Made 4 Math #7

Things you should know about me:

– I love sports

– I love arts and crafts

Being a fresh off the press teacher I don’t have much in the school decoration department. Last year when I started my first year teaching I really wanted to cover up the white walls. I spend so much time in the classroom that I wanted to make it feel a bit more homey. At the same time though my decorating sense when it comes to the classroom tends to be a bit more 4th grade classroom than high school. If it were up to me I’d have pompoms hanging from the ceiling and a pendant flag border. As a compromise I decided to make a school spirit banner to 1) take up a bunch of wall space and 2) show some school pride.
Here is the banner I made last year:

It looks like it might have taken a lot of work but it really didn’t. All I did was take a piece of clip art and blow it up to the size I wanted (pixelation doesn’t matter) and projected it up on the screen. I then took a plain white twin bed sheet that I got from Walmart for like $5 and traced the image with a sharpie. From there I just put it down on a flat surface and painted! I even added a pi and an infinity symbol to make it more mathematical. Unfortunately since I was laid off I gave the banner to my bestie in the math department figuring that should would get more use out of an 8ft tall spartan than I would.

This weekend I went through the same process but only used half the sheet to make a banner for my new school’s mascot.

Here is my helper during the process. As you can see where she goes destruction follows.

Hopefully I’ll be able to get him hung up this weekend and will post an updated pic!

A New Beginning and a Blank Canvas

So while everyone else was having a very interesting “conversation” on twitter (in quotes because half of it got deleted) I went to my classroom!

Some of you may know that I was laid off at my old school due to a reduction in force. I moved back home and was lucky enough to find a job nearish to home and in a great district. I’m so excited about starting my second year of teaching even if it is in an unfamiliar place. My new school is HUGE compared to everywhere else I’ve been with ~2,200 students in the high school alone. I’m pumped to be in such a large district and looking forward to all the chaos that comes with it.

Here are pictures of my room right after I walked into it for the first time:

I love that the room is a really nice size and although I love having all the wall space I do wish there was another whiteboard so that I could keep a weekly calendar much like I had done last year. Other things that made me have a mini breakdown were that there was no projector. I was able to email my department head though and she put in a work request to have one installed (yay!!!). I really wanted a projector because I love the structure it provides. It can save so much time by already having a warm up ready and also to have things like definitions and practice problems. I hate having my back facing my little chickpeas. Also I really wanted it for review games. Another big eye sore for me was that there are about 5 different types of chairs in my room. I’m the newbie on the block so I knew I would get some leftovers – I’m just happy to be employed!
I went back to school today along with some boxes and even though it isn’t much here is my progress:

This is all the crap the past teacher left in the room. I piled it up on the circular table by the door. ACK history :)

Made 4 Math #6

I cannot believe it is already the SIXTH #made4math

This week my post is very inspired from other #made4math -ers as well as all those elementary teachers out there who are always making super cool printables. The post that really got me going was from the MathSmith, she had a great post about ColourLovers and how you could use their patterns for your blogs background (PS Its how I have a new chevron background :) ). This got my wheels spinning on how I could use this to make binder covers. Warning: This does take a lot of patience and time, but I think the fact that you can customize these to be whatever you’d like is really priceless.

First up you need to go to colourlovers.com and make an account. Its free and easy!
After you’ve made your account go and look at the patterns – don’t worry about the colours, we can change those later!
Once you find a pattern you like you have three options.
1. Use this one as is
2. Browse similar patterns
3. Color this pattern (for tutorial purposes we’ll be coloring our own pattern)

Now over to the MathSmith’s post she shows you how to go through a cropping process to get the image to be seamless, well after I wrote this post the first time (and cropped everything myself) I figured out how to do it the easy way!!! *facepalm* (PS OMG doing it this way makes it so much faster!!!!!)

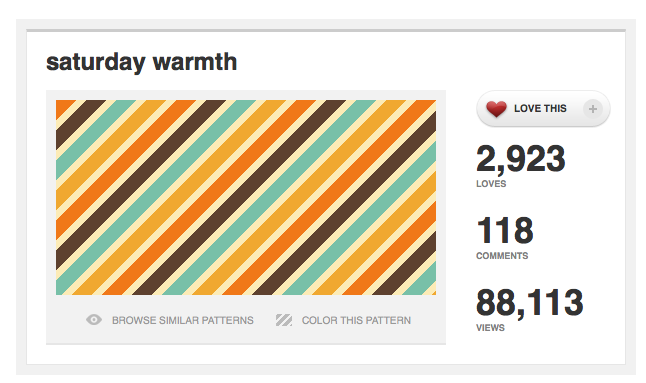
Once you’ve created your pattern it’ll take you to this screen. Look over on the bottom right of this picture and you’ll see all the different size options. Click on preview! It’ll take you to the picture, right click and save it somewhere on your computer!

Here are the two patterns I made for my binder cover:

Now onto the binder cover!!!! Open up PowerPoint!!!!

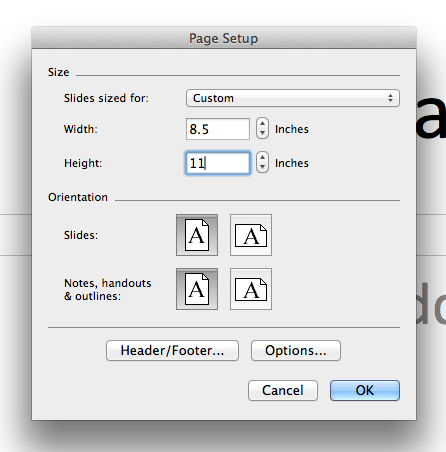
First thing we need to fix is the size of the slide, so go to File > Page Setup…
Change the size of the paper to standard paper size of 8.5 x 11 – your computer might prompt you saying it needs to resize the file that is fine. You can’t print out an 8.5×11 color picture you need to have a little space around the edges anyway.
The easiest way I’ve found to insert your pattern into the file is to use the rectangle tool and place it where you’d like it to go.
Now don’t worry about the sides overflowing it doesn’t matter, the left is what your page will look like. You need to format your rectangle though, so take away its drop shadow and also its line, we need to fill it using the fill effects option.
Go over to the picture or template and browse for your pattern. Click the tile button and press ok and then your rectangle should look like the one I have in the background.
Use a couple more rectangle tools and you should have a basic background. Next I used a rounded rectangle tool put it in the middle and added some text.
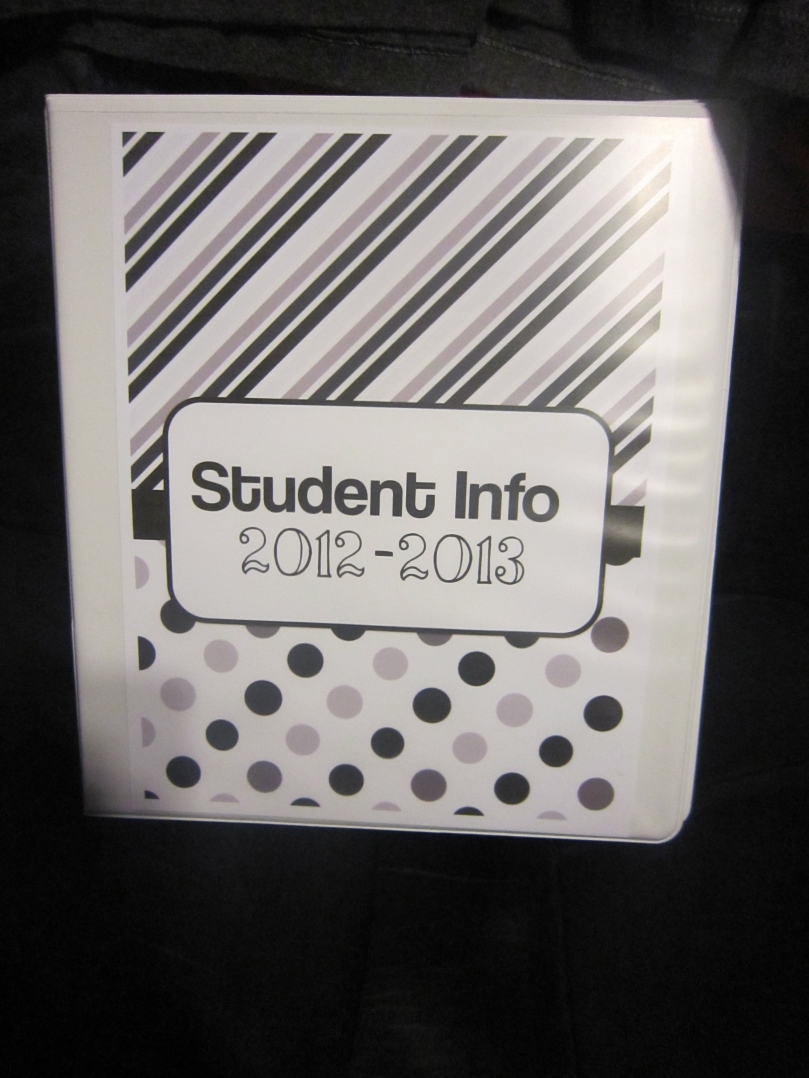
Here is my finished product, now just save it as a PDF and print that sucker out!
Here it is all printed out and stuck in a binder!

Well I hope you found this tutorial useful, it can be used for endless things – I just really needed some binder covers!!

Made 4 Math Monday #5

This past week I have been working on everything INB (interactive notebook) that I almost forgot about #made4math, blasphemy I know! So I got to work over the weekend and cranked out two little mini projects.

First Up: My DIY Clipboard

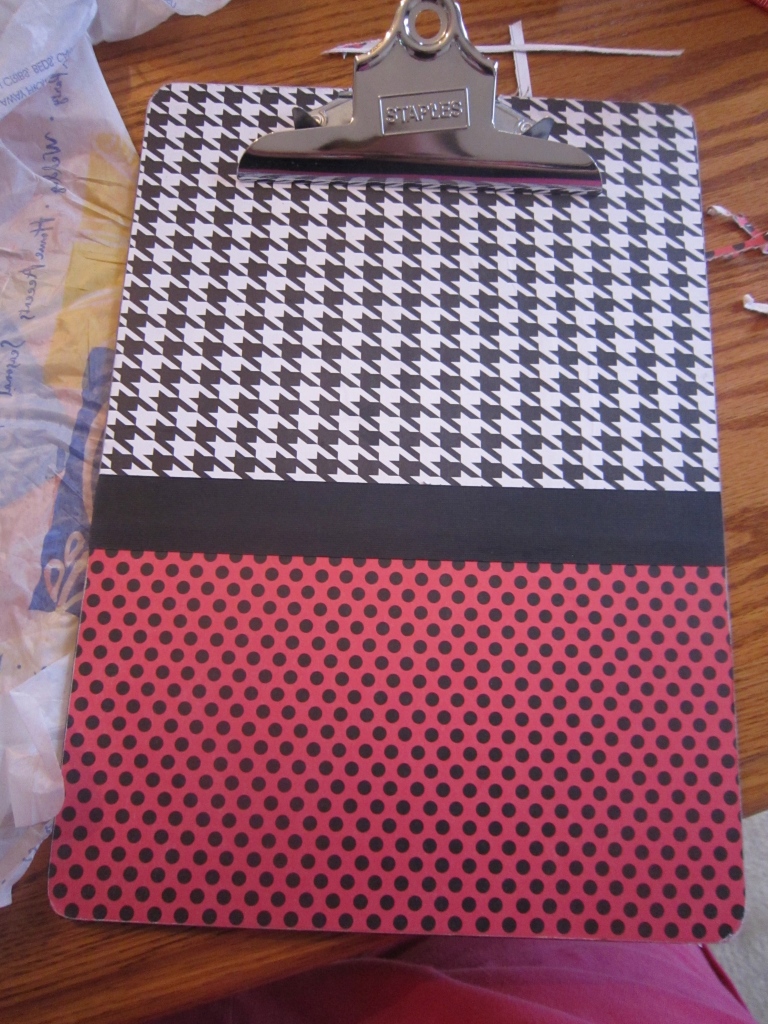
I carry around a clipboard a lot, I have my grades on it, post-its, and whatever other little papers make their way in throughout the day. I wasn’t satisfied with the one I had last year so I went to Staples and got a plain one for $1. I also went to Hobby Lobby where they were having a 40% scrapbook paper sale and got 5 pieces ( 2 for the top design, 2 for the bottom, and 1 piece for the center strip). The only other materials I used were Matte Modge Podge and black paint which I already had laying around my room. Here are the pictures of the process!

The I slapped some modge podge onto the clipboard and put on my paper. Protip: have a credit card handy to push out the bubbles.
My corners were super ugly but instead of using an exacto knife or scissors I…
sanded them down to this. Much better :)
Here is how she looked, nice but I still wasn’t satisfied. (Can you tell somebody learned about the caption tool recently)
I dry brushed the edges to give it a well more edgy effect because, well, I’m super edgy. I finished if off with a coat off modge podge just in case me and my clip board get caught in the rain.

Project #2: Flower Pens

I’ve seen a lot of people doing flumed feather pencils, but that isn’t quite my style (not a big feather girl). My other issue with the pencils, and I could totally be wrong, but that you can’t use the eraser with a bunch of feathers flyin’ around. With this in mind I figured I would make something with pens. I had seen this in an English teachers room when doing my student teaching and I loved them because they double as desk decoration.

Here is what you need if you want to make these:

-Fake flowers

-BIC pens (I used black, red, and blue)

– Floral Tape

– Vase and vase filler

To start out take out all your pens, toss the caps, and pop off the ends (I did this using a pair of pliers to help shimmy them out). Then take your flowers and take off the fake fabric green stem, you should be left with the flower and a skinny plastic stem. Then with wire cutters cut the plastic stems varying lengths. Stick the plastic stem into the pen where you had popped out the back and then use floral tape the wrap them up. Warning: floral tape is super sticky. Another word of the wise is once you are done take baby power in your hands and then rub the pens in them, this will take out the stickiness from the floral tape. VOILA! You are done! Just stick them in the vase and you now have a beautiful desk decoration as well as a bunch of functional pens. My students liked using them but opted out since they were pens and not pencils and they never once stole one, the girls did try to get me to sell them though :P

If you look closely some of the pens on the left and right look at tad odd, that is because when I first started I didn’t put them inside the pen, about halfway through i corrected this mistake. The pen in the middle is a “perfect” one.

INB Thoughts

For the past couple of days I have really been thinking hard about interactive notebooks and what I want to get out of them in my classroom. I’ll be teaching Algebra 1 & an integrated Algebra 2 course and I know that I want to use INBs in both of them. Go big or go home. The issue I’m facing currently is that interactive notebooks, in my opinion, have a lot of little details. I think these little details are important though to build a strong foundation for not only me, but for my students.


Materials I know I want my students to have:

– Composition Notebook (papers won’t fall out and they will fit in a gallon sized baggy – idea courtesy of @mgolding) – I’m thinking they will need 2 for the entire year – is this reasonable?

– Pencils/Erasers

-Tape (I don’t want to deal with the hassle of glue poop)

– Colored pencils

– At least 1 highlighter

*I will provide a class set of scissors


I want all of these things to be kept in a gallon sized baggy that I will provide to make for easy storing (whether it be in class or in their book bag). Students will always have all their materials as long as they all stay in the baggy. Hopefully by putting a couple pencils in the bag it will eliminate me having to buy them in bulk.

Since I want them to be able to store them in my room I want them to be able to find their baggy asap! I really want to avoid people huddling around looking for theirs 5 minutes after the bell has rung.

Ideas to make this possible:

– Decorate the composition book: duct tape, scrapbook paper, magazine clippings, numbers about me, etc. I think I might want to make this an assignment so it doesn’t take up class time and it still lets students have personal ownership of the journal.

– Also to keep classes separate I could have them put duct tape on the spine in a different color.

– Mark the baggy: I’m talking more than just black sharpie with the kid’s name on it. I think using patterned duct tape in a particular spot could help identify that student’s bag from others immediately.

Kind of like this but on a gallon bag. They can be different patterns and placed in different spots and on different angles. (Does this make sense, am I crazy?! Help me avoid traffic jams!)


Other cosmetic features that I’ve been thinking about are do I want

one of these or

one of these (but probably cut in half that way its like a 2-for-1)

The purpose of the pocket in either case would be to keep things that are in progress inside. I plan on doing warm-ups but these will generally be OGT test prep questions and since I don’t foresee students ever looking at them again I am thinking that each Monday students will grab a warm-up form and keep it all week and store it in the pocket, and on Friday I will collect them and make it either part of their homework or participation grade. I really want to stress to students that what is inside the notebook is testable material so I don’t want them thinking I’m going to throw some Geometry on their test just because it was a warm-up question.

I’m also thinking just for fun to keep the notebook together like this with a rubber band:

(for my personal INB I think I want these)

One thing I know I don’t want this to be are just worksheets taped inside a notebook. I want students to put their thoughts inside and reflect upon their learning. The left side page is usually where these things go- this is also the side that I’m most scared of. I want it to have meaning but I’m not quite sure I’m confident that I have the prompts that will make that happen. If you know of any websites that have good examples of “left side” pages please leave the links below!